I wrote up a quick tutorial on textures and actions about a month ago. Click here to check it out.
That was more of an introduction to using textures and using actions to edit photos. I had fun writing it, so I decided I wanted to write a separate post for actions.
Something I had pointed out in that post was this:
I NEVER (okay, hardly ever) apply an action and leave it 'as is,' or 'out of the box,' as Lynda calls it. As I've pointed out before, there is no real right or wrong in photo editing. Most of the time, what looks good is based upon a person's personal preferences and style. If 3 people take the same photo and edit it, there will be 3 different end results. And all 3 of them will look good. So, after applying an action, you definitely want to look at each layer and adjust them according to your own taste. Make it look the way you want it to look.
I've bolded the important part that I am going to focus on right now.
Actions are sets of commands or layers that are combined into one step. They are found as .atn files; both photoshop and pse come with stock actions already installed. In Lightroom, they are called presets. In GIMP, they are called scripts. There are dozens of great sites with handmade actions (or presets or scripts).
I find actions to be a very helpful when you need a quick edit, something to make a photo pop, or if you have a lack of inspiration. They are great for beginners who want to learn photoshop. After applying an action, you can then look at each layer individually, turn them on and off to see the effect, and tweak them to personalize the edit. That being said, I do NOT recommend the sole use of actions to edit photos. That gets old very quickly, and really just makes you seem lazy.
Below, you can see a comparison of one photo as I applied an action to it. I've labeled each version so you know which stage I am at. The first stage is SOOC + noiseware. I cannot emphasize enough the importance of noiseware. I was first introduced to it by Ashley over at Ramblings & Photos, and now I use it for almost every photo. *Quick side note: Check out Ashley's blog. She's awesome.

The next stage is After adjusting levels. This is ALWAYS my first step in photoshop. No questions asked. Just do it. You can make your photo lighter or darker, strengthen the red tones, decrease the green tones, increase contrast, etc.
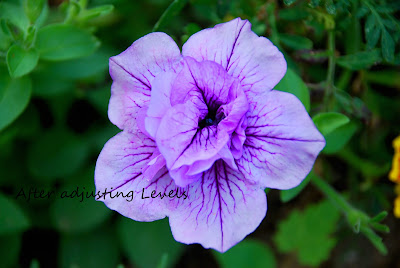
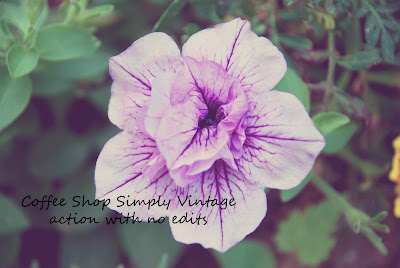
The next stage is action with no edits. I ran the action, flattened, and saved it. It's very vintage now, which is the purpose of the action, but it just looks overdone to me.
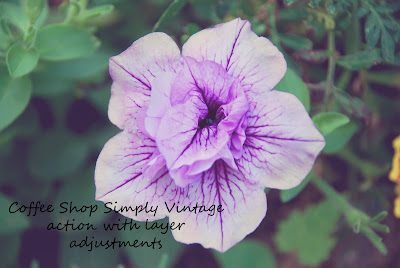
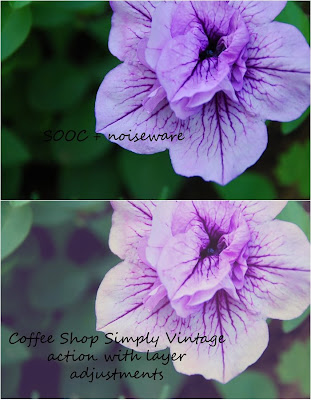
This last stage is why I wrote this post. Instead of flattening, I tweaked some of the layers. I lowered the opacity of some, while I raised it on others. I also used the layer masks to brush the layer on or off of certain spots.
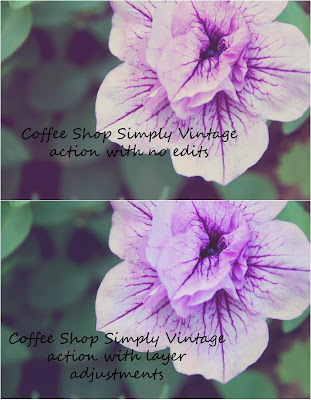
Here is a side by side comparison of the last 2 photos, as well as a side by side comparison of the SOOC shot and the last photo:


3 comments:
Great tutorial/writeup. Love what you've done and it is so important to make any action you use, your own.
Amy, those pics are great. Love what u have done to it. Great job!
Very nice write-up. The edit really makes the purple in the flower pop. Overall a much better effect than the SOOC!
Post a Comment