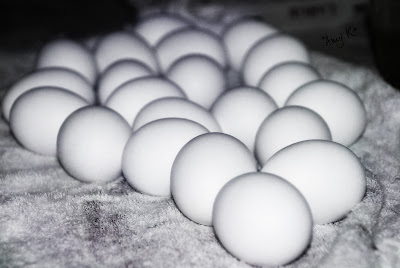
I automatically think of 3 things:
snow, flowers, and eggs.
But I don't want to think about snow anymore.
It's been averaging about 85 degrees this week.
And I post WAY too many pictures of flowers.
So, eggs it is.
While I do make hard-boiled eggs often,
I don't usually take pictures of them.
Unless, of course, I plan on dying them
to hide all over the house. For fun.


Now, let's see if I can remember how I did this. Most of my photo editing is unorganized and chaotic. I try different things, compare results, delete random layers, throw some masks around, and hope it all creates something I like. So, even though I edited this photo about 2.36 seconds before typing up this post,
I'm not exactly certain how I did it.
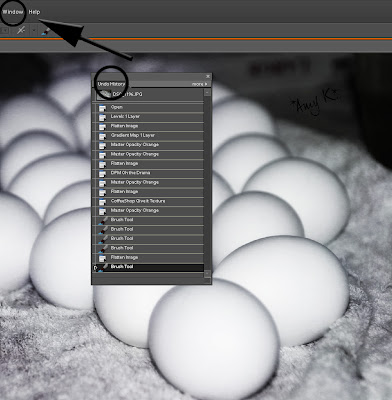
Luckily for me, (and for you, if you are anything like me and neglect to write down HOW you edit your photos), pse has this nifty little gadget to help me out! Before you close your edited photo, click on "Window" and "Undo History." Ta-da!

So here's a basic rundown of what I did:
--Levels mask to adjust light and dark; flatten image.
--Gradient Map mask to make it black and white.
--Adjusted the opacity of the above layer, apparently twice. It ended up being 87%.
--Flatten image again. (I do this after every major change.)
--Here, I ran DPM's Oh The Drama action to increase contrast drastically, because I love dramatic photos. I do this on almost every photo.
--Lowered the opacity of the action layer to 46%.
--Flatten image again.
--Then, I ran Coffeeshop's Give It Texture action. I can easily apply textures without this action, but I like that it gives me the opportunity to easily change the texture's hue/saturation/contrast.
--The texture I used is called Oil Painting 3 and it is one of many awesome FREE textures from Shadowhouse Creations. (Go visit his site - it's nothing less than amazing.) I changed the hue and saturation of the texture to a very pale shade of purple, because I wanted to preserve the whiteness of the eggs.
--Lowered the opacity of the texture layer to 54%.
--Brushed the color of the texture off the eggs. (Another bonus about using the Give It Texture action.)
--Brushed the texture itself off the eggs using a soft brush at 25% to soften them up.
--Flatten image one last time.
--Added signature.
I think this took me approximately 11 minutes to complete. Sometimes, I spend upwards of 30 minutes editing a photo. Other times, I do 4-5 minutes and I'm done. I try not to edit for hours and hours. If I let myself spend that much time editing, then I feel like I'm manipulating the image too much. Besides, who has HOURS AND HOURS to spend editing photos? I'd rather be reading, spending time with family and friends or taking more pictures!
Another thing to remember as you are editing your photos: Every single person on Earth who edits photos, is different and unique. We each have our own styles and preferences. You should always tweak layers and actions to make an edit that YOU like. Don't worry about what other people think, because there is no WRONG way to edit photos. "One man's junk is another man's treasure."

Simplicity Blog Hop
(This week's theme is white.)

Pixel Perfect Before & After

Hosted by Cecilyand Mamarazzi


5 comments:
The explainer totally went over my head... being a photography and photoediting MORON, but I called for my daughter to come see (she wants to be a photographer)--even though I KNEW she wasn't home. See... I can SEE the difference, so I knew she'd be interested... I will try to send her back--I've been meaning to anyway (she is 15)
It's okay, Tami! Just a few months ago, this would have gone over my head, too! As it is, sometimes I STILL glaze over when reading people's edits. :P
But I really can't wait to see Nat's photos when she finally gets a camera.
Very creative! Great edit!
Thanks so much for participating!!
Neat shot!
Post a Comment